
Over the past few weeks, we have been showing how to use DevOps practices and tools inside of WinCC OA. If you are new to this DevOps series of posts, feel free to check out these additional blogs:
What is DevOps?
DevOps: 6 Steps to Integrate Git into WinCC OA
Is TDD the Future of MES/SCADA Development?
DevOps: High-Speed Programming Unit Tests
Today we will take a big step further and integrate Jenkins into the development process. This tutorial expects you to have a few things setup and to understand a few others:
- Git must be integrated into your WinCC OA environment (see: Git integration)
- This tutorial uses GitHub. You must have a GitHub account setup.
- Jenkins must be downloaded and installed on your development machine (https://jenkins.io/download/).
- You must have written a unit test utilizing the High-Speed programming method inside of WinCC OA.
Step 1: Setup Jenkins to Connect to GitHub
The first thing you will need to do is generate a token for Jenkins to use. To do this, you will need to navigate to GitHub to generate a token at https://github.com/settings/tokens/. Create a new token and give it the rights (at minimum) to read the repository.
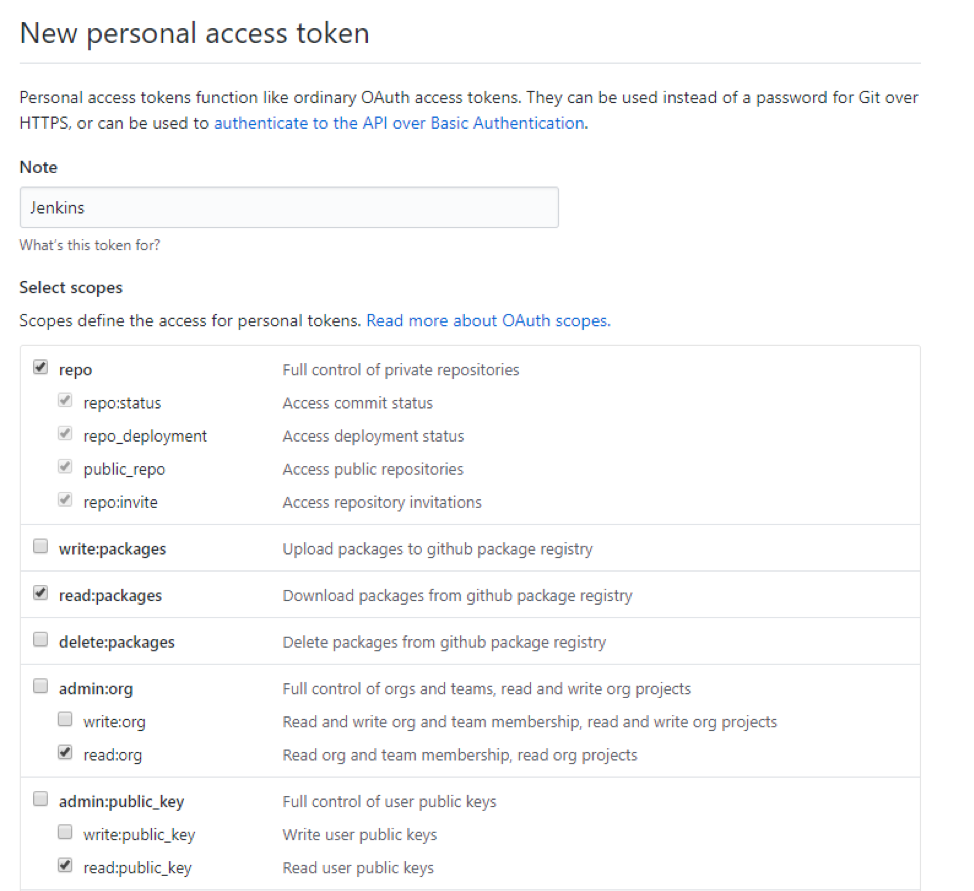
Once you have completed this setup, you will get a key that looks like this one:

Do not lose this key. You will not be able to get it again.
Step 2: Connect Jenkins to GitHub
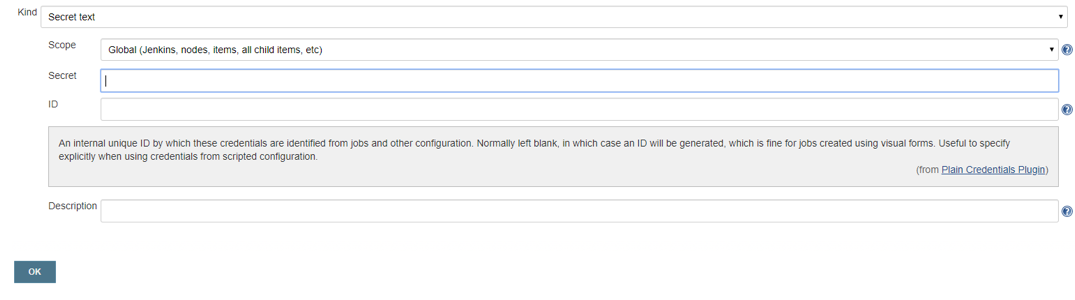
Next, you will need to go into your Jenkins server and allow communication from Jenkins to GitHub. Inside the credentials options, you will need to add two new global credentials. One will be a Secret text and the other will be a Username and password.

For the Secret text credential, place the generated key from GitHub into the Secret input field and give it an ID of GitHubToken and hit OK.
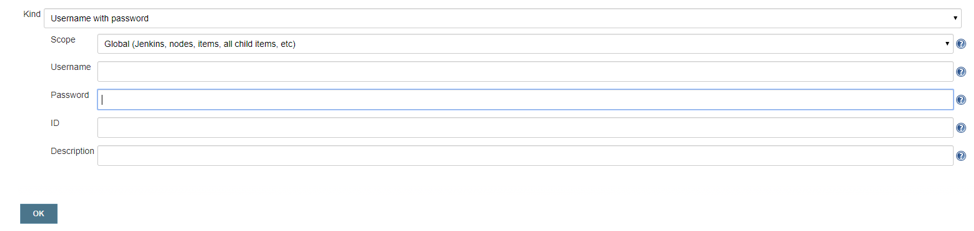
Now complete this process again, but this time make it a Username with a password. In this one, you will enter your GitHub username and password.
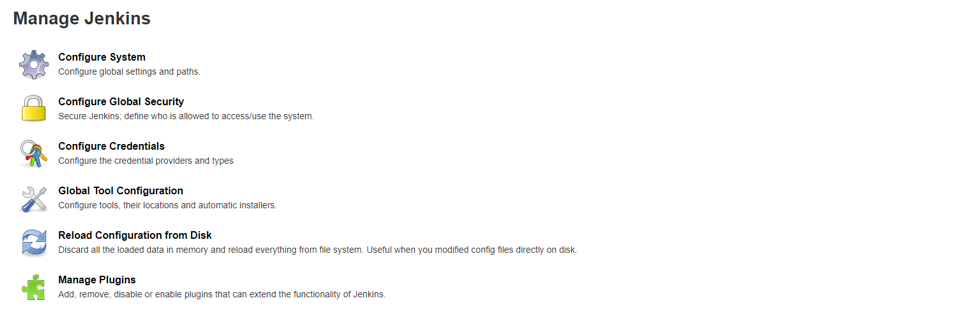
Once this is done, restart your Jenkins server. Finally, we will establish a connection between GitHub and Jenkins. Click the Configure System from the Manage Jenkins menu option.

Scroll down the screen and find the GitHub server option. Select the Add GitHub Server dropdown, give it a name, and select the GitHubToken we created earlier.
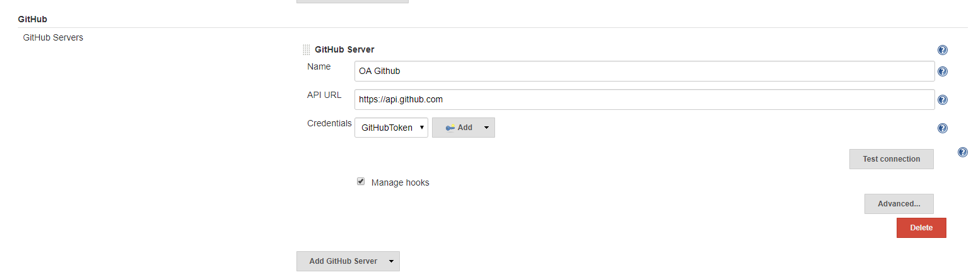
Test the connection and then click Save on the bottom of the page.
Step 3: HTTP Request Plugin
We will be using REST calls to communicate with our WinCC OA instance. Adding in the HTTP Request Plugin makes it very easy to do this. Navigate back to the Manage Jenkins screen and click the Manage Plugins link.
Click on the Available tab and search for HTTP Request Plugin. I already have it installed so I am on the Installed tab.

Step 4: Open WinCC OA and Create a Server to Hook into Jenkins
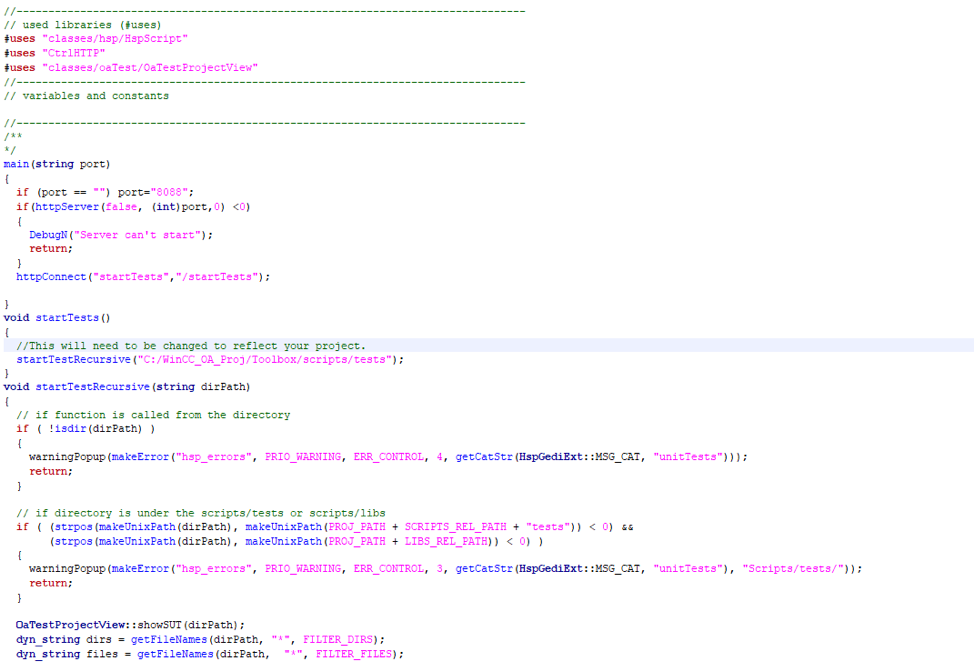
For ease of use, a file will be included to make this step easier. What UnitTestServer.ctl does is creates a simple HTTP server inside of WinCC OA and open an endpoint for Jenkins to hit. The startTestsRecursive() function is a built-in WinCC OA function that is used to run the Unit Testing for the High-Speed Programming module. One note is that you will need to change the directory in the startTests() function to your own project name where your tests live.
You can download the file here: UnitTestServer.ctl
Next, take this script and add it to your WinCC OA console so it can be started.
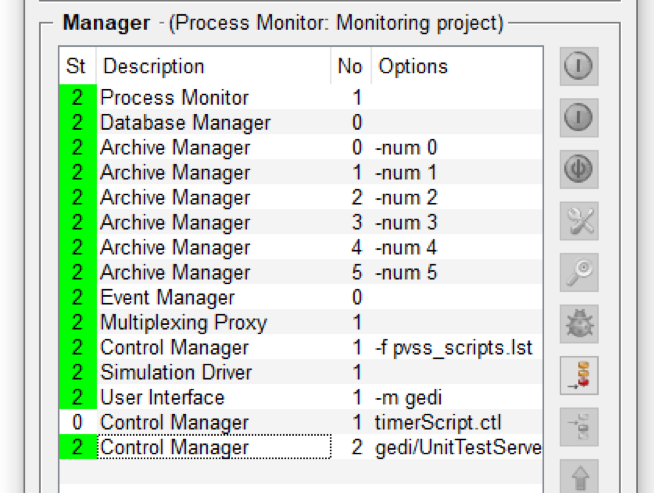
If you are successful you should get the following message from the WinCC OA Log Viewer.

Step 5: Make a Jenkinsfile
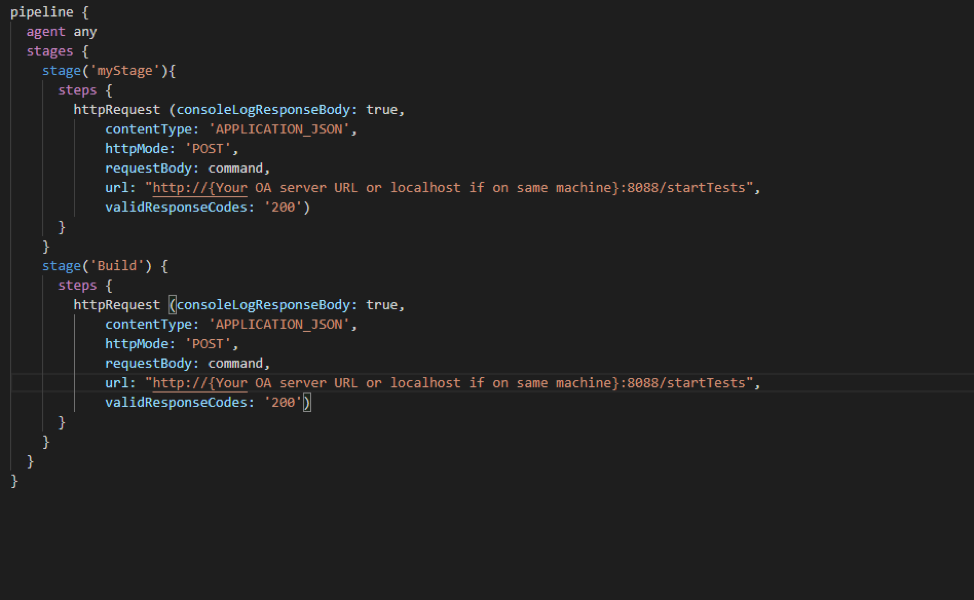
In your Git repo make a new file called Jenkinsfile. It cannot have an extension. Place it at the same level as your .git folder. I make my Jenkins with two commands that do the exact same thing, but gives an example of how different things can be done at different build processes. Below is the code for a base Jenkinsfile.
Step 6: Create your Jenkins Pipeline
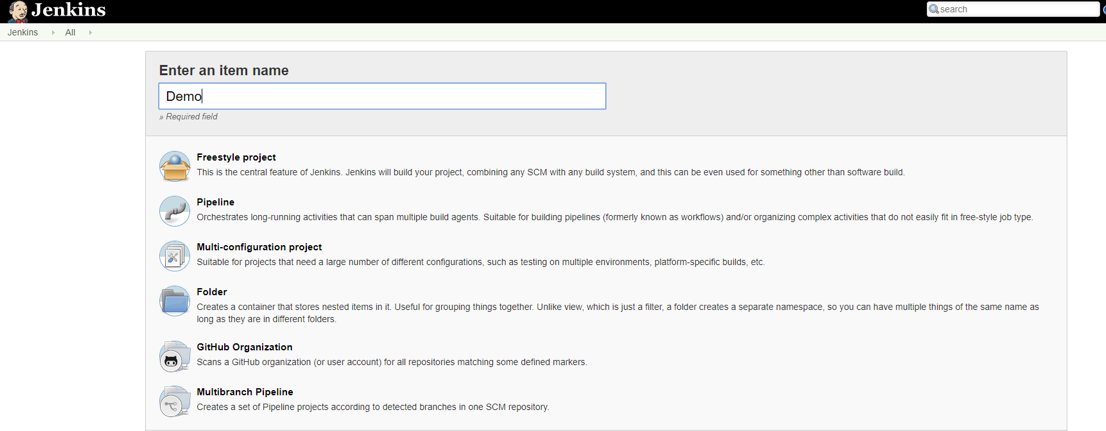
From your Jenkins server select New Item, then select MultiBranch Pipeline on the next screen.
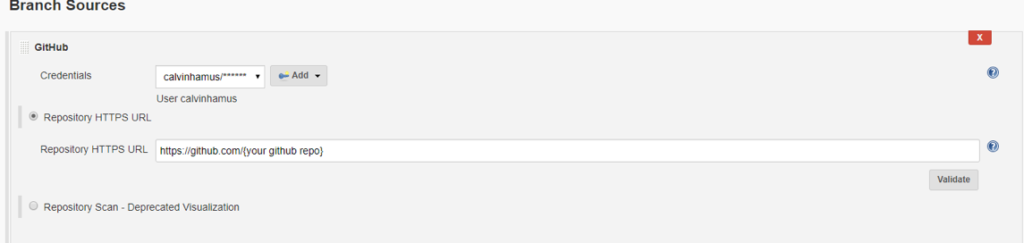
Inside the Pipeline configuration, add the Branch Source GitHub. Select the credential dropdown to be your GitHub login credentials and enter in the repository that you added the Jenkinsfile to int he URL field.
Finally, change your Scan Multibranch Pipeline Triggers to run periodically and click Save at the bottom of the page.

Step 7: Make a Change and Test it Out
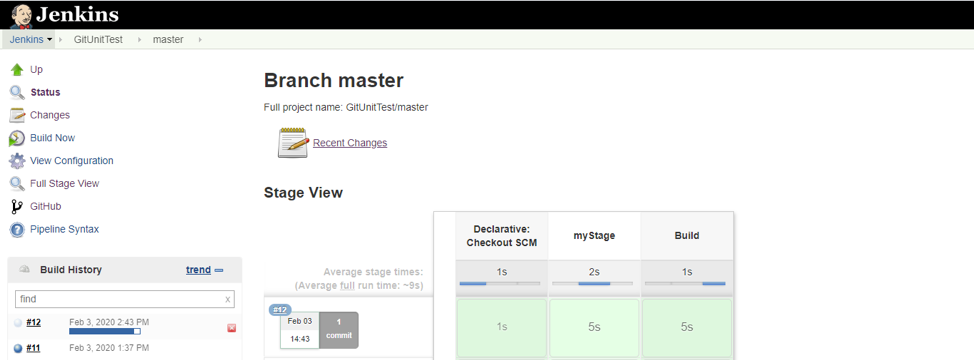
With both the Jenkins Pipeline and the UnitTestServer.ctl in WinCC OA running, make a change in your project and push the changes to your GitHub repo. In Jenkins you will see something like this:
In WinCC OA your Log Viewer will show this:

Final Thoughts
This is a simple example and one of the many things that can be done with WinCC Open Architecture, Git, and Jenkins. There are possible ways to streamline this even more with additional plugins and other ways to accomplish the exact same result. Think of this as a starting block that you can use to automate your process even more.