Digital Platforms

Connect with KAASM for news, updates, company culture, and technology trends.

Increase Workplace Safety with Real-Time Locating Systems

By Shawn Sandoval | 04/24/2020
Featured in

Writing to you from ground zero here in Seattle, we have been monitoring and working with essential businesses throughout this pandemic. Just yesterday, a Tyson Foods plant in Eastern Washington, reported that 100 of their workers tested positive for COVID-19. There is no doubt we have to rethink how we are going to get back to work in a safe manner and rethink how we conduct business.

As a technology company, one of our core competencies is active transponder technology. Prior to the COVID-19 pandemic, our company had been developing a location tracking software application that leverages active transponders by Siemens Industry to locate and track things. The things that can be monitored in real-time include products, equipment, and people. In reality, you can track anything that a transponder device can be attached to.

Our Latest Thinking

What if you could…

  • Contact trace to monitor and manage social distancing
  • Monitor a heat map of high-traffic areas in your facility so that you could focus sanitation efforts in the right places and manage how people move around the workplace.
  • Be able to notify individuals who came into contact with an infected person in your facility.

Our development team has created a software extension for existing Siemens Real-Time Locating Systems (RTLS) to enhance location tracking. We were planning to launch our software extension in June or July however, given the current circumstances, we thought it would be apropos to start making people aware of the product as it could mitigate a tremendous amount of risk.

Built on Real-Time Locating Systems by Siemens

RTLS is a solution that allows anything with an active transponder to be monitored and tracked. These active devices can be attached to things like equipment, products, tools, and or people. The active signals coming from the “things” can then be viewed in real-time and decisions can be made to increase safety, and improve operations.

How does it work?

Customers would need to determine what things would need to be monitored along with their associated areas. Transponders would then be attached to the things and a signal would be transmitted for consumption. This signal would be ingested at an anchor or gateway location and available for viewing both on-premise or on a wide area network (Cloud). RTLS information is accessible via smart devices, laptops, PC workstations, etc. The graphic below is a visual representation of the RTLS system setup.

Location Insight

Once your things are connected, they can now be tracked in real-time and informed decisions can be made. For example, the following insight would enable the user to understand the traffic patterns of both individuals or groups of people at a particular area or location. Based on the figure below, one could deduce that focused sanitation efforts should be applied in higher traffic areas or general re-routing could be taken into consideration.

Here is a dashboard view of things in an area being monitored in real-time.

Additional Features

  • Real-Time tracking
  • Historical records applied to areas and general movement
  • Contact tracing
  • Association – When things come into contact or relation with other things

Stay safe and healthy.

To learn more about applying RTLS technology at your facility please feel free to contact us.

Read More

InFluxDB: Parallel Data Logging with WinCC OA NextGen Archiver

By Calvin Hamus | 04/21/2020
Featured in

The New Stuff

With the release of WinCC OA 3.17, one of the most anticipated additions was the inclusion of InfluxDB. Since InfluxDB is based on an open-source architecture it dramatically improves ease of integration and offers some cool new features. The following steps will show you how to set up parallel data logging to a separate instance of InfluxDB on a remote computer.

Here is our simple system setup.

  1. Open System Management Click the Database Configuration button from within your System Management to open your configurations. 
  2. Inside the NGA configuration click on the Backend tab and add a new backend by clicking on the insert below button. 
  3. Give the new backend a name
  4. Select a Profile, the default profile will work fine for this example.
  1. Click the wrench icon to open the settings.
  2. ClickExecutable file:” set it to NGAinfluxBackend.
  1. Next, go to the Database tab on this screen and fill in the connection information to your other instance of InfluxDB. 

NOTE(S): You will need to create the database in your other instance of InfluxDB to reference on this screen.

  1. Select theArchive Groups” tab.
  2. Click on the insert below button to pull up the add Archive Group screen. 
  3. Select the backend you just created and fill out the rest of the options

NOTE(S) You can follow the same settings as the EVENT Group.

  1. Open your Para and add your archive config. Inside the archive config simply click the Insert Below button and select the archive group that we created in the previous steps
  1. Inside of your stand-alone InfluxDB system, you must create a retention policy that is the same name as your Backend and Archive Group within WinCC OA.

One of the benefits of this approach is one database can provide smoothing and the other would contain raw data. You can configure your setup to do this.

Summary

The NGA is a great addition to the WinCC OA platform and will make the way that data is collected in the platform even easier.  For other WinCC OA and InfluxDB ideas, check out our other blogs. For more information or questions, please comment below or contact us!

Read More

WinCC OA: Discontinued in V3.17

By KAASM | 04/07/2020
Featured in ,
WinCC OA Logo

With the recent release of WinCC OA V3.17, Siemens/ETM has improved and extended modern features into the platform and stopped supporting outdated a few outdated components. The following post highlights some of those changes.

Features Discontinued in 3.17

COM manager 32bit

The COM manager will be no longer available as 32bit version.

Login based on hook functions

Siemens/ETM will no longer support this functionality in WinCC OA 3.17. Siemens/ETM strongly recommends taking a  closer look at the WinCC OA new login framework (see the documentation for details).

OLEDB Provider

The OLEDB provider will no longer be supported, please have a look at the Excel Report or recommended SOAP Reporting Interface.

Advanced S7-Lib

This will no longer be supported. Siemens/ETM will provide the source code at portal.etm.at, please note that this will be provided without support, liability or guarantee of functionality.

For more information or questions, please comment below or contact us.

Read More

WinCC OA V3.17 P003 Now Available for Download

By KAASM | 04/01/2020
Featured in ,

Siemens ETM released patch 3 for WinCC OA version 3.17, today. You can download WinCC OA V3.17 P003 via our Knowledgebase software download section.

Read More

Doom and WinCC OA get Embed Together

By Calvin Hamus | 03/31/2020
Featured in ,

One of the best things about working for KAASM is the ability to try different things while challenging my creativity among our solutions and the tutorials I’ve put together. As a big player of video games and lover of video game culture and history, I have been thinking a lot about the new game Doom Eternal.

It led me to wonder if I could get the original Doom to run inside of WinCC OA? The creative juices started flowing and after a few setbacks and lots of caffeine, I answered my question. Yes, you can run Doom inside of WinCC OA!!  Would this ever be useful to an end customer? Probably not. However, it does show the flexibility of the software and its ability to do almost anything you ask of it. Hopefully, somewhere out there, an operator is secretly setting up deathmatches in their downtime.

Inspired by: https://itrunsdoom.tumblr.com/

#itrunsdoom

Read More

WinCC OA: Free InHouse Development for 3.16/3.17

By KAASM | 03/27/2020
Featured in ,

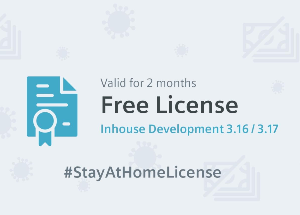
In support of remote working environments, Siemens/ETM is offering WinCC OA v3.16/v3.17 Development licenses valid for 2 months for FREE for WinCC OA Solution Partners and WinCC OA Premium Solution Partners.

Interested in this offer?

  • let us know your version;
  • the e-mail address of the person in your organization who should receive the license key

You can submit your request to us at sales@kaasm.com.

Please consider also a WinCC OA Version Upgrade for your customers.

Read More

WinCC OA: Creating Dashboards with Web Technologies

By Calvin Hamus | 03/26/2020
Featured in

WinCC OA has the ability to embed HTML / JS / CSS into a project. These features are essential for creating modern dashboards.  In this blog, you will explore how to use modern web libraries to interact with WinCC OA. With a few clicks, you can turn WinCC OA into a web server that can do many things, including hosting web pages inside of your project. The easiest way to enable the webserver is to locate the webclient_http.ctl file, then drag and drop the .ctl file onto your WinCC OA Console.  After you’ve added it to your console, you can turn it on like any other Control Manager.

You can deliver HTML / CSS / JS web files, by adding them to the following project directory location. Most of the time your starting file will be an index.html file.

{Path to your Project}\data\html

Connecting your web pages to WinCC OA can be done using standard tools inside of the graphical editor (GEDI) that will allow you to build responsive designs. By using a combination of WinCC OA’s Layout Management and CSS you can build 100% responsive design for all types of devices. In this example, we’ve created a new .xml panel, added the WebView object, and an initialize script that will enable communication between the HTML page and WinCC OA.

Image “A” shows the dashboard via a Quick Client test in a normal-sized view.  The two numbers, 3 and 4, are being read from WinCC OA and will update when the datapoint changes.

Image A

Image “B” shows exact same dashboard code base displayed on a mobile device. 

Image B

HTML / CSS / JS for responsive design has been around for a long time. The toolsets are mature and readily available. If you are looking to create modern applications using WinCC OA, please feel free to contact us for guidance.

For a complete step by step tutorial on this topic please visit our knowledge base article: Using Web Technologies in WinCC OA to Build Dashboards

Read More

DevOps: Continuous Deployment Using Git, Jenkins, and WinCC OA

By Calvin Hamus | 02/24/2020
Featured in ,

Why DevOps with WinCC OA is cool!

In the IT world, you would NEVER, EVER, make edits to a production system without going through proper quality assurance change acceptance. However, in the industrial world, for some reason, it has been acceptable to test and commit changes on production systems without the need for isolated development testing prior to deployment. Shouldn’t we be asking, why?

Is it because…

  • There is not enough time to set up this type of development environment;
  • IT tools are not readily available for use;
  • There is no awareness of DevOps tools or how to use them (know-how);

Understanding that IT and OT worlds are converging at an exponential pace, we need to help educate our industry about DevOps practices and the tools that are readily available in modern SCADA packages like WinCC Open Architecture. In our previous DevOps blog posts, we showed you how to integrate Jenkins and Git into your WinCC OA projects to facilitate automated unit testing. 

In this blog post, we are going to bring it all together by setting up Continuous Deployment utilizing WinCC OA, Git, and Jenkins. This tutorial expects you to have the same set up as in the previous blogs and to have followed the previous tutorials to set up both your Git and Jenkins integration.

Requirements

Step 1: Create a class to hold your Unit Tests

WinCC OA does not natively interact with an outside system like Jenkins to manage development deployments and it is good practice to use something like Unit Tests to determine if your code should be deployed to a production system. I have modified the code from our previous blog post and created a new class to accomplish this. The major changes from this file to the automatically generated one from the High-Speed Programming module is that I am using the base level function of oaAssertEqual() to get the result of pass or fail instead of writing it to the project UI.  I have two tests in this file and both are very simple and I know they will pass, in a real project these would need to be written in a way so that they would help prevent errors.

Step 2: Create a WinCC OA Web Server for Jenkins to hook into

We need some way for Jenkins to integrate into WinCC OA and a webhook is the easiest way to accomplish this.  The following script will start a web server, make a single endpoint available, create an instance of the TstUnitTestDemo class from before, runs the two tests, and return a result.

Step 3: Add your server to your console

The easiest way to do this is to drag the file onto the Console and it will automatically add it.  Make sure that you start the Control Manager.

Step 4: Update your Jenkins file

This Jenkins file has a little bit of logic in it mostly checking if the tests from WinCC OA pass or fail and if they do pass to run a git pull command.

Step 5: Set up a development environment

This is a little bit of a chore because not every file is stored in the Git repository, however, what worked for me was to copy the project to a different computer, deleting the .git folder, git cloning my repository, and then copying those files into my project.  Git cloning will link your repository to your local project.

Step 6: Makes changes and push them to the repository

If everything is set up correctly when you make a push to your git repository Jenkins will recognize the change and execute your scripts. After Jenkins has run the scripts, if you look at your production system you will notice the changes to Scripts or Panels are now live on your production server.

Note(s) and Limitations

This set up is very limiting but exposes the power of these tools working together.  I would also connect something like Slack to your Jenkins to notify your other developers that changes have been made.  Also, this type of Continuous Delivery is only as good as the guidelines in your development team’s practices. If the team is lax on the Unit Tests this will not do you much good.  Another thing to keep in mind is that the git version control set up inside of WinCC OA is built to track changes in panels, pictures, and scripts.

Read More

DevOps: Integrating Jenkins into WinCC OA

By Calvin Hamus | 02/04/2020
Featured in ,

Over the past few weeks, we have been showing how to use DevOps practices and tools inside of WinCC OA. If you are new to this DevOps series of posts, feel free to check out these additional blogs:

What is DevOps?
DevOps: 6 Steps to Integrate Git into WinCC OA
Is TDD the Future of MES/SCADA Development?
DevOps: High-Speed Programming Unit Tests

Today we will take a big step further and integrate Jenkins into the development process. This tutorial expects you to have a few things setup and to understand a few others:

Step 1: Setup Jenkins to Connect to GitHub

The first thing you will need to do is generate a token for Jenkins to use. To do this, you will need to navigate to GitHub to generate a token at https://github.com/settings/tokens/. Create a new token and give it the rights (at minimum) to read the repository.

Once you have completed this setup, you will get a key that looks like this one:

Do not lose this key. You will not be able to get it again.

Step 2: Connect Jenkins to GitHub

Next, you will need to go into your Jenkins server and allow communication from Jenkins to GitHub. Inside the credentials options, you will need to add two new global credentials. One will be a Secret text and the other will be a Username and password.

For the Secret text credential, place the generated key from GitHub into the Secret input field and give it an ID of GitHubToken and hit OK.

Now complete this process again, but this time make it a Username with a password. In this one, you will enter your GitHub username and password.

Once this is done, restart your Jenkins server. Finally, we will establish a connection between GitHub and Jenkins. Click the Configure System from the Manage Jenkins menu option.

Scroll down the screen and find the GitHub server option. Select the Add GitHub Server dropdown, give it a name, and select the GitHubToken we created earlier.

Test the connection and then click Save on the bottom of the page.

Step 3: HTTP Request Plugin

We will be using REST calls to communicate with our WinCC OA instance. Adding in the HTTP Request Plugin makes it very easy to do this. Navigate back to the Manage Jenkins screen and click the Manage Plugins link.

Click on the Available tab and search for HTTP Request Plugin. I already have it installed so I am on the Installed tab.

Step 4: Open WinCC OA and Create a Server to Hook into Jenkins

For ease of use, a file will be included to make this step easier. What UnitTestServer.ctl does is creates a simple HTTP server inside of WinCC OA and open an endpoint for Jenkins to hit. The startTestsRecursive() function is a built-in WinCC OA function that is used to run the Unit Testing for the High-Speed Programming module. One note is that you will need to change the directory in the startTests() function to your own project name where your tests live.

You can download the file here: UnitTestServer.ctl

Next, take this script and add it to your WinCC OA console so it can be started.

If you are successful you should get the following message from the WinCC OA Log Viewer.

Step 5: Make a Jenkinsfile

In your Git repo make a new file called Jenkinsfile. It cannot have an extension. Place it at the same level as your .git folder. I make my Jenkins with two commands that do the exact same thing, but gives an example of how different things can be done at different build processes. Below is the code for a base Jenkinsfile.

Step 6: Create your Jenkins Pipeline

From your Jenkins server select New Item, then select MultiBranch Pipeline on the next screen.

Inside the Pipeline configuration, add the Branch Source GitHub. Select the credential dropdown to be your GitHub login credentials and enter in the repository that you added the Jenkinsfile to int he URL field.

Finally, change your Scan Multibranch Pipeline Triggers to run periodically and click Save at the bottom of the page.

Step 7: Make a Change and Test it Out

With both the Jenkins Pipeline and the UnitTestServer.ctl in WinCC OA running, make a change in your project and push the changes to your GitHub repo. In Jenkins you will see something like this:

In WinCC OA your Log Viewer will show this:

Final Thoughts

This is a simple example and one of the many things that can be done with WinCC Open Architecture, Git, and Jenkins. There are possible ways to streamline this even more with additional plugins and other ways to accomplish the exact same result. Think of this as a starting block that you can use to automate your process even more.

Read More

WinCC OA: Setting up Chronograf with InfluxDB

By Calvin Hamus | 01/16/2020
Featured in

With the release of WinCC OA 3.17, one of the newest and biggest changes is the addition of the NextGen Archiver.  The NextGen Archiver runs on an InfluxDB database and is a great way to store your data.  InfluxDB is one of the fastest-growing time-series databases in the market, which means there are already some fantastic tools that can be used to visualize your data coming out of WinCC OA.  The tool we are going to show today is Chronograf.  Chronograf is the user interface for stand-alone instances of InfluxDB, but can also be used inside of OA.

Note: This tutorial is being done on a Windows machine, if you are using a Mac or Linux the steps may be a bit different.

Step 1

Create a new project inside of WinCC OA. Choose any type of project you want, I used “Legacy”, but make sure you choose the Use NextGenArchiver checkbox.

Step 2

Go to https://portal.influxdata.com/downloads/ and download the latest stable build of Chronograf, currently v1.7.17.

Step 3

Take the two .exe files that get downloaded, place them in a drive that is easy to find and remember, I use C:\Chronograf.  The chronograf.exe will need to be used to start up the server.  Double click the chronograf.exe file to start up the server or you can use the script: DebugN(system(“C:\\Chronograf\\chronograf.exe”)); on an Initialize function, or where you would like to launch the server inside of OA.  The inside of OA option only works if you run the project as an Administrator.

Step 4

Once the Chronograf server is running you can open up a web browser and navigate to http://localhost:8888.

Step 5

Click get started to get to this screen.  Enter in a Connection URL of http://localhost:8086 (this is the default if you changed it update this field).  The username is etm with a password of etm#123 (again this is the default).  Enter a Telegraf DB if you would like.

Step 6

You can press the Skip button on the next two screens.  If everything worked, you should have something like the below image.  You can now use Chronograf to explore your data from inside WinCC OA to visualize it in any way you can think of.

Bonus

Chronograf is a web-based tool we can directly embed it into OA using a WebView object.

About WinCC OA

SIMATIC WinCC OA (OA) is a powerful, flexible, and diverse SCADA/HMI/MES/IIoT platform used to control and monitor industrial applications. The object-oriented platform is able to handle network complexity with ease, allowing for anywhere from 2 to 2,048 distributed control systems to be connected on a single network. Highly customizable, each individual system can be calibrated as a redundant or non-redundant, single, or multi-user system. The software supports a number of device connectivity options that include but not limited to Siemens, Rockwell, Schneider Electric, OPC/OPC UA Standards, MQTT, Web Services, Node-RED, and allows for customized distributions and branding, making it a great platform for software OEMs in addition to end-users.

About InfluxDB

InfluxData, the creators of InfluxDB, delivers a modern Open Source Platform built from the ground up for analyzing metrics and events (time-series data) for DevOps and IoT applications. Whether the data comes from humans, sensors, or machines, InfluxData empowers developers to build next-generation monitoring, analytics, and IoT applications faster, easier, and to scale delivering real business value quickly. Based in San Francisco, InfluxData customers include AutodeskCiscoeBay, and Coupa. Visit https://www.influxdata.com/. Twitter: @influxdb.

Read More